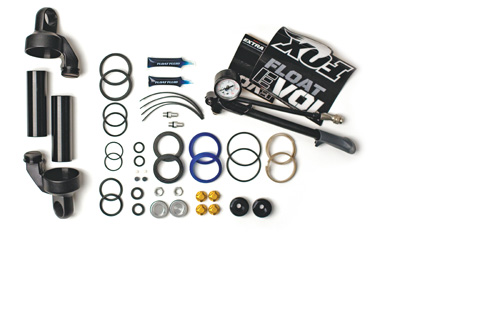
Can you twist the cap off a bottle of beer? If so, you can perform routine air sleeve service that’s required to maintain good bump-damping performance from Fox FLOAT air shocks. Shocks for snowmobiles get blasted with ice, snow, dirt, rocks and other debris that, for FLOAT shocks, could cause them to lose air pressure. These nine easy steps – originally published in the January 2009 issue of Snow Goer magazine – explain how to remove the air sleeve, clean and lubricate it, and reassemble. This service is different than a shock rebuild, which requires full disassembly, and special tools and knowledge to change the oil and charge the nitrogen.
Step 1: Remove Chassis Bushings
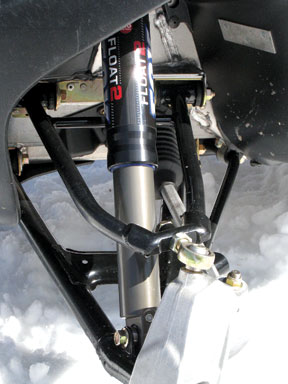
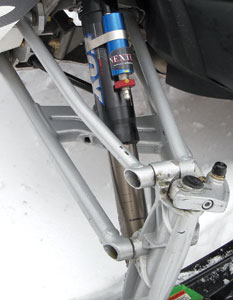
With the shocks removed from the chassis and in a bench vise, use a flat screwdriver to pry the rubber chassis bushings out of each shock – this allows clearance so the air sleeve can be removed and serviced (the air sleeve is the larger tube).

Step 2: Remove Air Sleeve
Twist off the cap from the Schrader valve (the valve you use to adjust air pressure) and relieve the air pressure. Now that the air spring has been discharged, grab hold of the air sleeve with a hand and turn it counter-clockwise to unthread it from the shock assembly. If the sleeve cannot be removed by hand, use a strap wrench to loosen the sleeve. Twist the sleeve until it’s free from the shock, and then slide it off.
Step 3: Remove Sleeve Parts
With the sleeve in hand, remove the blue plastic ice scraper, the rubber seal and the Teflon-coated aluminum bushing. Make note of the order and orientation for correct reassembly. The scraper, bushing and seal will be greasy, and this is where debris collects. If Fox FLOAT shocks go too long without service, the dirt and debris could push through and damage the main air seal and cause the air spring to fail.

Step 4: Clean Shock Parts
Wipe the scraper, seal and bushing with a shop towel. It’s safe to use a product like brake cleaner to clean the parts, but it usually isn’t necessary. Inspect the parts and replace them if they have nicks or cuts. Now push a rag all the way through the air sleeve to clean the bore and inspect it for damage – an airborne rock could have dented the tube and damaged the seal or O-ring. New sleeves and other parts for snowmobile, ATV and mountain bike shocks are available from the Fox service center in Baxter, Minnesota.

Step 5: Reassemble The Air Sleeve
The air sleeve is ready for reassembly now that the sleeve and its components are clean. First, slide the aluminum bushing into the sleeve until it bottoms out against the lip. Next, slide in the black scraper with its tapered end facing up. Each seal sets into a step so this is difficult to screw up, but double-check your work.

Step 6: Lube The Parts
The parts need to be lubricated with a synthetic, low-temp grease now that they’re in place. Fox specifies a product called Slick Honey that’s available at sporting goods stores – it’s used for maintenance on paintball guns. Fill the gap between the scraper and seal with grease. Air sleeve maintenance is complete after this step.

Step 7: Clean The Wear Bands
With the shock still in a vise, remove both white wear bands and the aluminum bearing assembly that holds the wear bands – it’s not recommended to remove the black rubber air piston seal. Clean the wear bands with a shop towel; clean the black rubber piston seal, too. Reinstall the wear bands and coat them with Slick Honey. The shock and air sleeve are ready to be reunited.
Step 8: Install Air Sleeve
Before installing the air sleeve on the shock, pour a few drops of Fox FLOAT Fluid into the cap (you removed the air sleeve from this cap in the first step). This special oil helps the shock work smoothly. As you slide the sleeve over the bearing assembly, make sure the wear bands pinch closed. There will be friction, but it should slide in place smoothly and easily. With the sleeve reinstalled, cycle it up and down a few times to coat the bore with grease and ensure smooth operation. Now use a shop towel to wipe off the excess grease from the sleeve’s exterior and spread it inside the sleeve.
Step 9: Install Shock Cap
Twist the air sleeve into the shock until it’s hand tight, then use a strap wrench to tighten it one-eighth of a turn. Reinstall the chassis bushings, wipe off the shock assembly’s exterior with a shop towel and refill the chamber with air to your desired setting.